Posted By
Mercado Roma
1410 View(s)
VIDEO
DEMO VIDEO In this project we will create a simple oscilloscope, using only the gizDuino LIN.https://processing.org/download/ Arduino IDE.
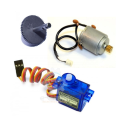
Materials:
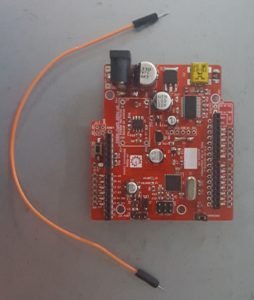
Upload the following code to your Arduino.
/* Poor's Man Oscilloscope Arduino Skecth This is an example code for reading the analog input and to display the value signal output on processing. */
#define ANALOG_IN 0
void setup () { Serial.begin (9600 ); }
void loop () { int val = analogRead (ANALOG_IN); Serial.write ( 0xff ); Serial.write ( (val >> 8 ) & 0xff ); Serial.write ( val & 0xff );
}
and Run this following code to the Processing IDE.
/* * Oscilloscope * Gives a visual rendering of analog pin 0 in realtime. * * This project is part of Accrochages * See http://accrochages.drone.ws * * (c) 2008 Sofian Audry (info@sofianaudry.com) * * This program is free software: you can redistribute it and/or modify * it under the terms of the GNU General Public License as published by * the Free Software Foundation, either version 3 of the License, or * (at your option) any later version. * * This program is distributed in the hope that it will be useful, * but WITHOUT ANY WARRANTY; without even the implied warranty of * MERCHANTABILITY or FITNESS FOR A PARTICULAR PURPOSE. See the * GNU General Public License for more details. * * You should have received a copy of the GNU General Public License * along with this program. If not, see <http://www.gnu.org/licenses/>. */ import processing.serial.* ; Serial port; // Create object from Serial classint val; // Data received from the serial portint [] values;float zoom; void setup () { size (1280 , 480 ); // Open the port that the board is connected to and use the same speed (9600 bps) port = new Serial (this , Serial . list()[0 ], 9600 ); values = new int [width ]; zoom = 1.0f ; smooth (); } int getY (int val ) { return (int )(height - val / 1023.0f * (height - 1 )); } int getValue () { int value = - 1 ; while (port. available() >= 3 ) { if (port. read() == 0xff ) { value = (port. read() << 8 ) | (port. read()); } } return value; } void pushValue (int value ) { for (int i= 0 ; i< width - 1 ; i++ ) values[i] = values[i+ 1 ]; values[width - 1 ] = value; } void drawLines () { stroke (255 ); int displayWidth = (int ) (width / zoom); int k = values. length - displayWidth; int x0 = 0 ; int y0 = getY(values[k]); for (int i= 1 ; i< displayWidth; i++ ) { k++ ; int x1 = (int ) (i * (width - 1 ) / (displayWidth- 1 )); int y1 = getY(values[k]); line (x0, y0, x1, y1); x0 = x1; y0 = y1; } } void drawGrid () { stroke (255 , 0 , 0 ); line (0 , height / 2 , width , height / 2 ); } void keyReleased () { switch (key ) { case ' +' : zoom *= 2.0f ; println (zoom); if ( (int ) (width / zoom) <= 1 ) zoom /= 2.0f ; break ; case ' -' : zoom /= 2.0f ; if (zoom < 1.0f ) zoom *= 2.0f ; break ; } } void draw (){ background (0 ); drawGrid(); val = getValue(); if (val != - 1 ) { pushValue(val); } drawLines(); }
Documented by: Kayle Urbano
For more details about the projects, see the following reference: Electronics Projects, Tutorials and Reviews. (n.d.). Retrieved from https://randomnerdtutorials.com/


 by
by